
Jamf Parent Guide for Parents

© copyright 2021 Jamf. All rights reserved.
Jamf has made all efforts to ensure that this guide is accurate.
Jamf
100 Washington Ave S Suite 1100
Minneapolis, MN 55401-2155
(612) 605-6625
Under the copyright laws, this publication may not be copied, in whole or in part, without the
written consent of Jamf.
Jamf and the Jamf Logo are registered or common law trademarks of JAMF SOFTWARE, LLC in the
U.S. and other countries.
Apple, the Apple logo, Mac, macOS, and Safari are trademarks of Apple Inc., registered in the
United States and other countries.
IOS is a trademark or registered trademark of Cisco in the United States and other countries.
All other product and service names mentioned herein are either registered trademarks or
trademarks of their respective companies.

4
Getting Started with Jamf Parent
Jamf Parent is a free iPhone, iPad, Apple Watch, and Android app that allows you to manage your
children's school-issued mobile devices. Depending on the software your school uses to manage
your children's school-issued mobile devices, you may be able to use the Jamf Parent web app. Using
Jamf Parent, you can restrict and allow apps and device functionality on your children's devices. You
can only manage your children's devices with Jamf Parent during the time periods specified by your
school's Information Technology department.
This page provides step-by-step instructions on how to use the features in Jamf Parent to manage
your child's school-issued device. To add your child's device to Jamf Parent, please follow the
instructions provided by your school.
Note: All images shown here are for the iOS mobile app. The options depicted may vary if using the
Android, web, or Apple Watch app.
5
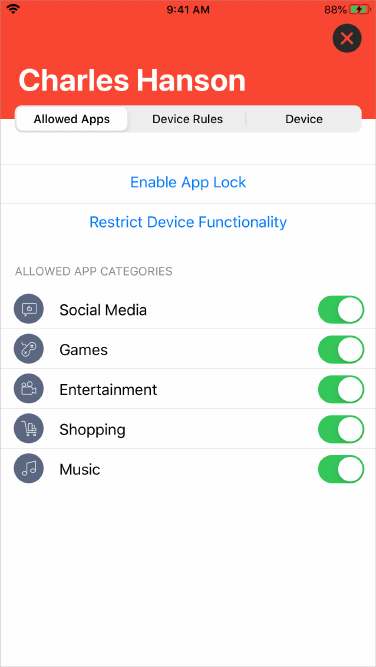
Allowing and Restricting Apps
Jamf Parent allows you to choose which apps your child can use on their school-issued device. You
can allow and restrict apps on your child's device by tapping the child device you want to restrict,
and then tapping or clicking the tab. You can either restrict apps by category, such as Restrictions
social media or games, or specific apps, such as Safari or Messages. To restrict apps by category, use
the toggles under Allowed App Categories (mobile device app) or App Blocker (web application) to
allow or restrict certain app categories.
6
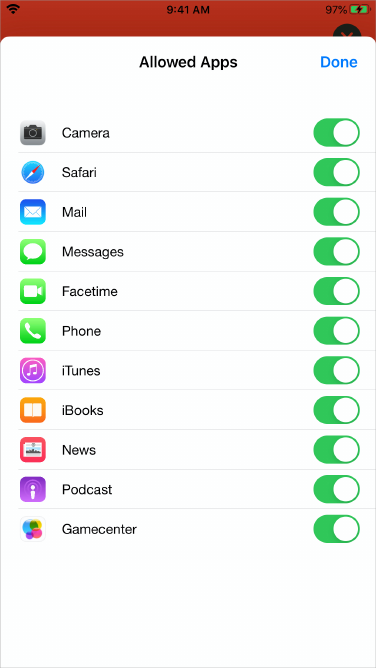
To restrict specific apps, tap (mobile device app) or under Device Restrict Device Functionality
Functionality (web application) use the toggle next to each app to allow or restrict certain apps.

7
1.
2.
3.
Enabling App Lock
You can use App Lock to set a timer for app restrictions. While your child's device is in App Lock, they
will only be able to use the apps you allow during the specified time period. If you only allow one
app, that app launches on your child's device and they cannot exit the app until the App Lock timer
expires. You cannot use App Lock on the Apple Watch app.
When using the Jamf Parent mobile device app, you can enable App Lock by doing the following:
From the dashboard, tap the child device you want to restrict.
Tap the tab.Restrictions
Tap , and then set the timer and tap the apps you want your child to have access to.Enable App Lock
When using the Jamf Parent web application, you can enable App Lock on your child's device by
turning on . Enter the app name, and then configure the time period and click Enable App Lock Apply
.App Lock

8
1.
2.
3.
4.
5.
Setting Locations
Note: This feature may not be supported on your Jamf Parent app depending on the software your
school uses to manage your child's school-issued device.
If the locations feature is supported on your Jamf Parent app, you can use it to see the approximate
location of your child's device and set Device Rules based on the location. You can view the location
of your child's device on the Jamf Parent mobile app by tapping their profile icon from the
dashboard, and then tapping the tab, or by clicking in the sidebar of the web Locations Locations
application. You cannot set locations using the Apple Watch app. You can configure locations by
doing the following:
Tap or click .Locations
Create a new location by doing one of the following:
(Mobile device app) Tap the child's device you want to configure a location for, and then tap Create
.location
(Web application) Click .Add Location
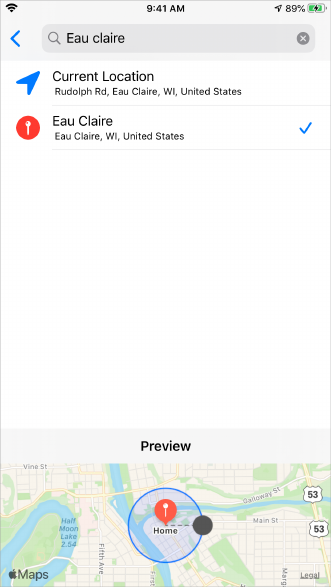
Enter a name for the location, such as "Sports Practice", "School", or "Home".
Set the Radius of location. The radius determines how far your child's device can be from the location
and still report as being at that location.
Touch and hold the map, and then drag the map to find the location.
9
6.
7.
Tap the map to set the location.
Tap .Save
10
1.
2.
3.
4.
Setting Device Rules
If the Device Rules feature is supported on your Jamf Parent app, you can use it to schedule app
restrictions on your child's device. This allows you to schedule homework time or bedtime. You
cannot set Device Rules using the Apple Watch app. You can set Device Rules by doing the following:
From the Jamf Parent dashboard, tap or click the child device you want to configure the Device Rule
for.
Tap the tab.Device Rules
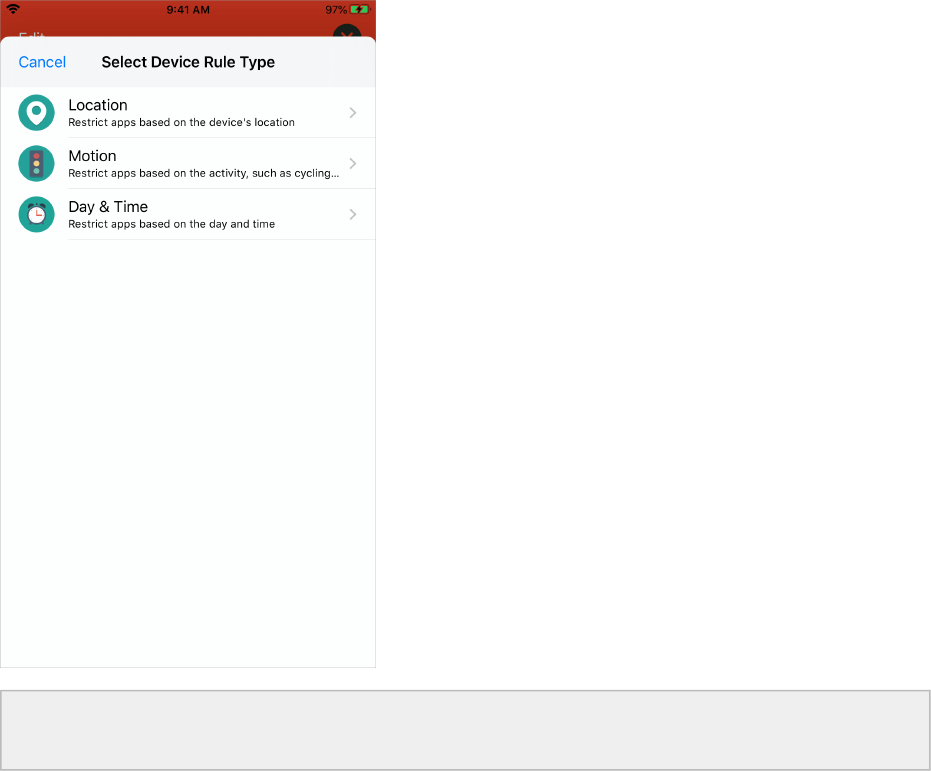
Tap on the mobile app or click on the web application.Create Device Rules Add
Tap or click the type of Device Rule you want to set.
Note: Location and Motion Device Rule types may not be available on your Jamf Parent app
depending on the software your school uses to manage your child's device.
11
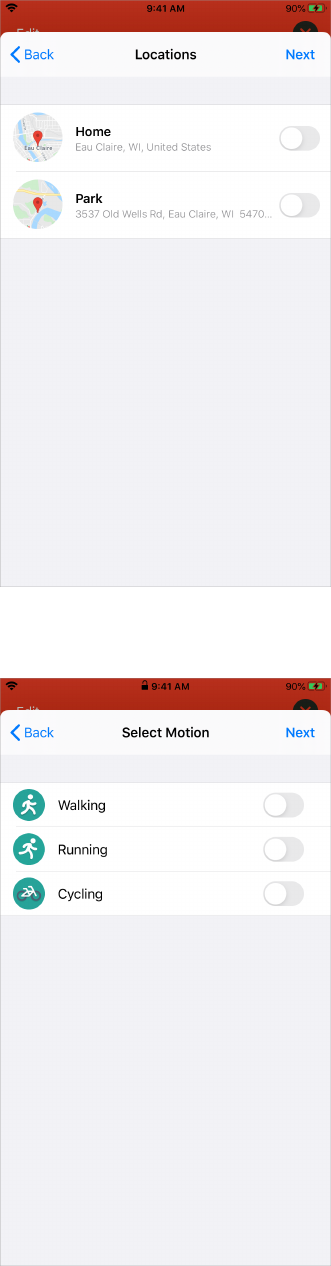
5.
6.
(Location type only) Use the toggles to select the locations where this Device Rule should be active
and tap or click .Next
(Motion type only) Use the toggles to select the motions that should activate this Device Rule and tap
or click .Next
12
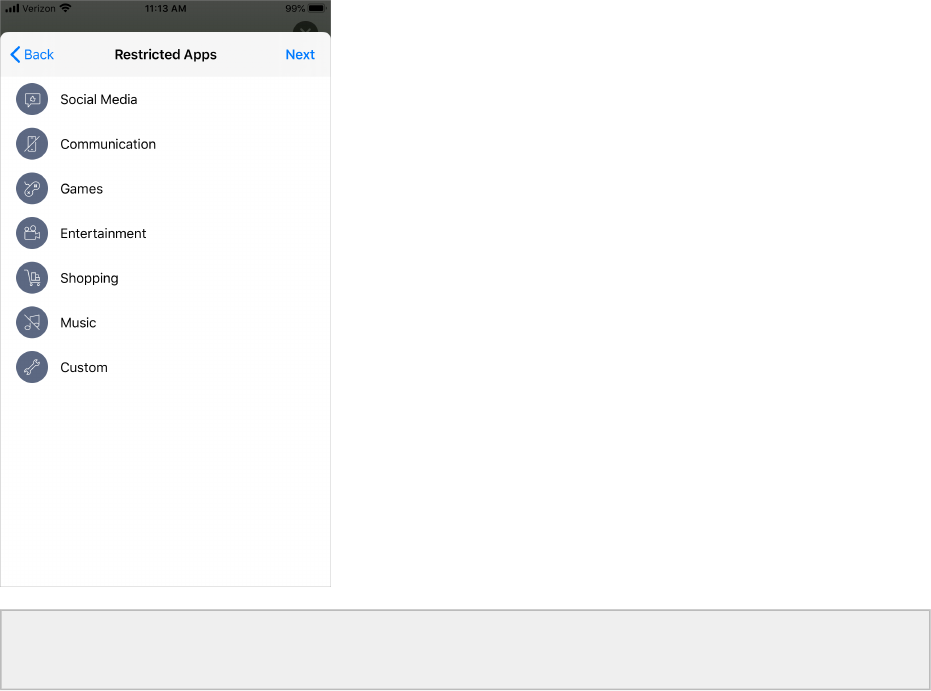
7. Select the category of apps you want to restrict and tap or click .Next
Note: Restricting app categories may not be available on your Jamf Parent app depending on the
software your school uses to manage your child's device.
13
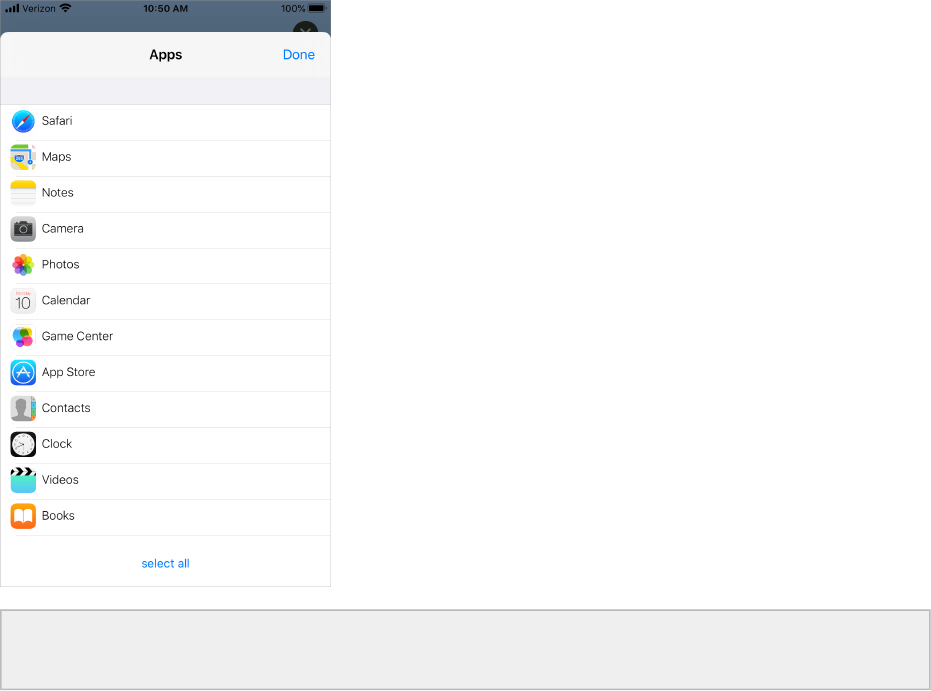
8. Select the specific apps you want to allow and tap or click .Done
Note: Allowing specific apps may not be available on your Jamf Parent app depending on the
software your school uses to manage your child's device.
14
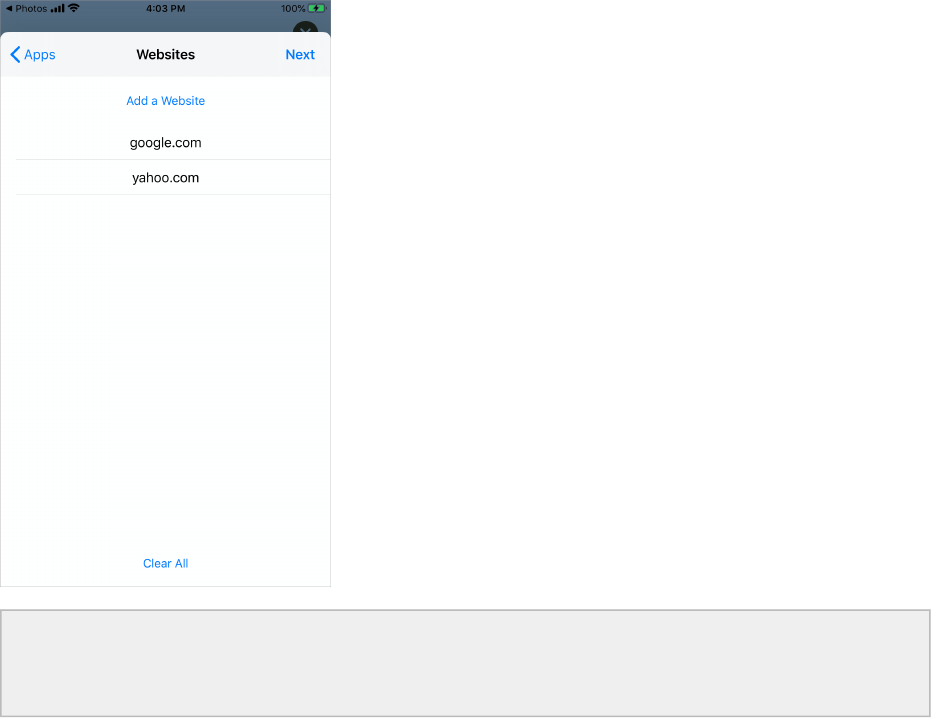
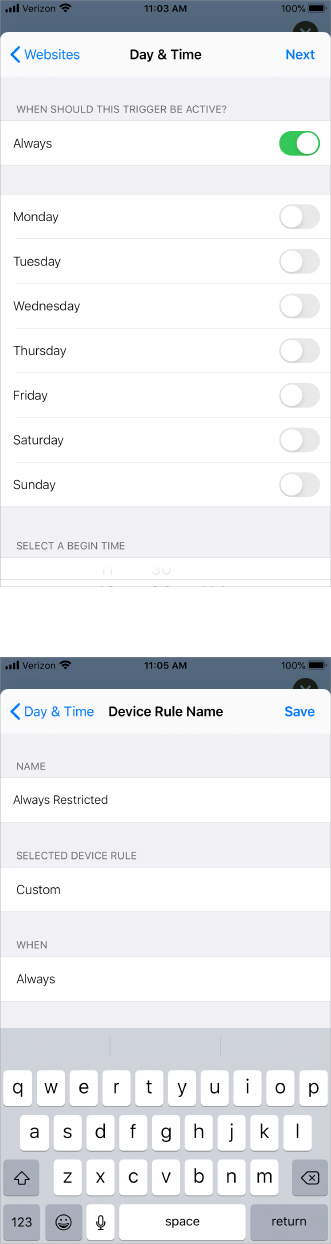
9. Tap to select the websites you want to allow and tap or click .Add a Website Next
Note: Allowing specific websites may not be available on your Jamf Parent app depending on the
software your school uses to manage your child's device. Some websites may be blocked
depending on the web content filtering settings your school has configured.
15
9.
10.
11.
Use the switches to configure what days and times the Device Rule should be active and tap or click
Next.
Enter a name for the Device Rule and tap or click .Save

16
You can delete a Device Rule by swiping left on the Device Rule from the Jamf Parent mobile app or
by selecting the device rule and clicking from the web application.Delete
Removing a Child's Device from Jamf Parent
By removing your child's device from Jamf Parent, you will no longer be able to manage their school-
issued device. You must remove a child's device from your iPhone before it will be removed from the
Apple Watch app. To remove a child's device from Jamf Parent, tap or click the Settings icon in the
top-right corner of the screen and tap or click under Account. Tap or click to confirm.Remove Yes
Related Information
For related information, see the following Jamf Knowledge Base video:
Teaching Parents Jamf Parent
Find out how to use Jamf Parent.
